- PhoenixMiner 5.6d — AMD+NVIDIA GPU Miner
- PhoenixMiner Binance: Setup for Ethereum Mining
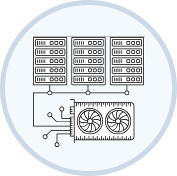
- 1. Mining rigs and environment
- 2. Login / Register
- 3. How to get mining software
- 4. Set up mining software
- Monitoring miners and viewing income
- Ready example
- Phoenix Miner 5.6d: Настройки для Binance, Скачать, Команды
- Скачать для Windows/Linux
- Что такое PhoenixMiner
- Как настроить PhoenixMiner
- Шаг 1 — Скачайте майнер
- Шаг 2 — Настройте батник для Ethereum на Binance Pool
- Шаг 3 — Запустите PhoenixMiner
- Видео Гид
- Пример PhoenixMiner для Ethermine
- PhoenixMiner настройка для NiceHash
- Мониторинг и прибыль
- Алгоритмы и хешрейт
- Сравнение PhoenixMiner vs TeamRedMiner
- Команды
- PhoenixMiner заблокирован хромом
PhoenixMiner 5.6d — AMD+NVIDIA GPU Miner
Fastest Ethereum/
Ethash miner with lowest devfee

Effective Ethereum mining speed is higher by 3-5% because of a completely different miner code — much less invalid and outdated shares, higher GPU load, optimized OpenCL code, optimized assembler kernels.
Supports both AMD and nVidia cards (including in mixed mining rigs). It runs under Windows x64 and Linux x64.

The watchdog timer checks periodically if any of the GPUs freezes and if it does, restarts the miner. Supports memory straps for AMD/NVIDIA cards. Use the -straps command-line option to activate it.
Step 1: Download the miner
Attention! For security reasons, Windows may stop you from opening the bat file. In this case, you should permit it to open in the pop-up window.
Step 2: Enter the following command:
Step 3: Configure the miner with your settings
Step 4: Start mining
Now that your miner is set up, you’re able to sit back and watch as your video cards gain you passive income every day in the form of Ethereum. It is important to consider any variable costs that you may incur during the mining to determine your profitability. Variable costs may be electrical costs, maintenance costs, pool fees, dev fees, exchange fees, etc.
Every pool has a different interface but the principle stays the same. You’ll need to go to your pools website and type in your public wallet address. Let us use Ethermine pool as an example.
You type your public wallet address in the search bar and you’ll be able to see all of the information about your Ethereum mining efforts. In the case of Ethermine pool once your balance reaches 0.01 ETH it will get sent to your wallet address that you’ve typed into the start.bat file earlier.
If you would like to donate Hashing power — 8503c4f68ebab097178eeb3a175b48398F4ed040
How does Ethereum mining work?
The result of digital mining is called proof of work system. . However, mining Ethereum means more than increasing the volume of Ether in circulation. It is also necessary for securing the Ethereum network as it creates, verifies, publishes, and propagates blocks in the blockchain.
What do you need to mine Ethereum?
- An Ethereum wallet to hold all of your newly found currency;
- GPU drivers;
- A mining application (PhoenixMiner AMD+NVIDIA GPU Miner);
- A mining pool address if you’re going to mine within a mining pool;
- A graphics card (GPU) with at least 4gb of RAM.
How many Ethereum can be mined?
Most Ethereum blocks are around 2mb. A new Ethereum block is created every 14 seconds. 18 Million Ether are mined every year.
Источник
PhoenixMiner Binance: Setup for Ethereum Mining
A short guide on how to set up a program on the Binance Pool. 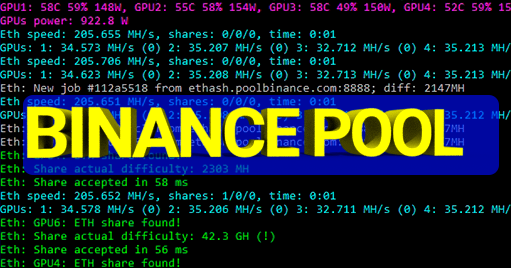
Here’s a guide to mining Ethereum on Binance.
1. Mining rigs and environment
- Graphics cards (NVIDIA or AMD, video card memory at least 4GB)
- Operating system: Windows, Linux
- Virtual Memory: Each graphics card has 5 GB of virtual memory (example: 6 × graphics cards = 30 GB virtual memory)
- Mining software: HiveOS, MinerOs, Easy Miner, ASIC, NCard, etc.
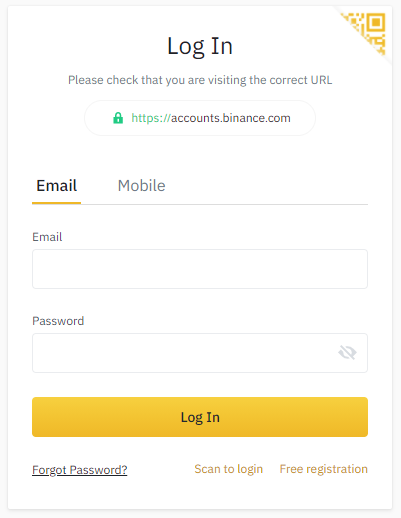
2. Login / Register
Please follow these steps to set up your account:
Visit the official website and register for a Binance Pool account to create a mining account.
Step 1. Go to the Binance Pool website: pool.binance.com. 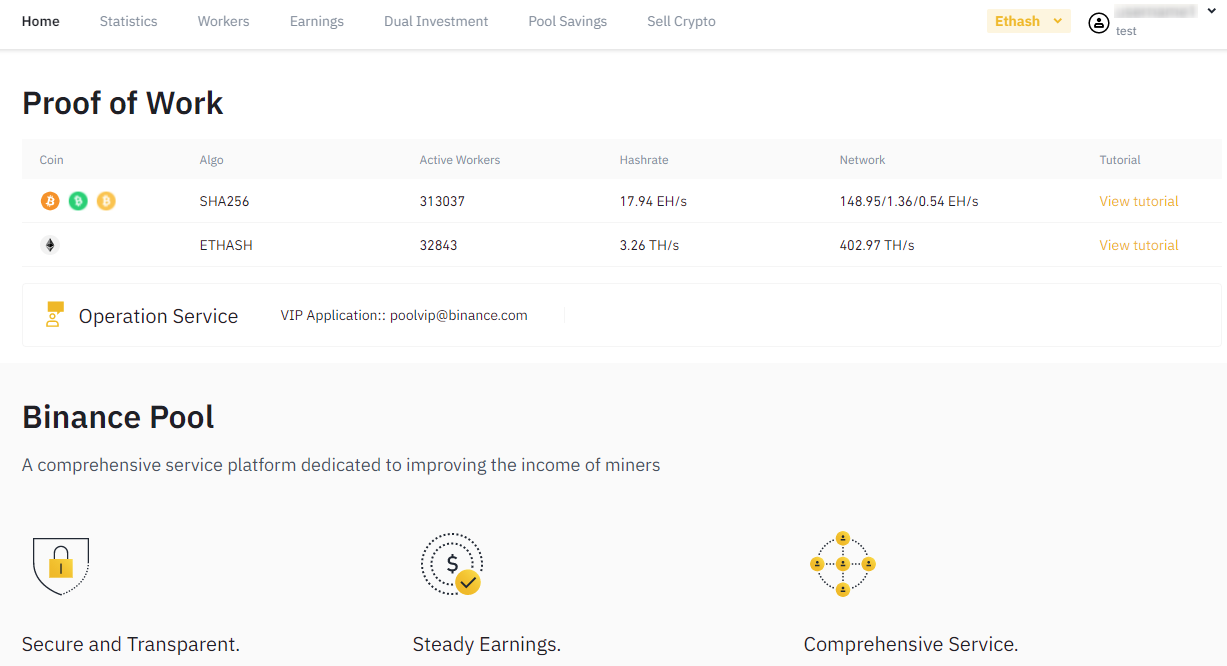
Step 2: Log in to an account or register an account.
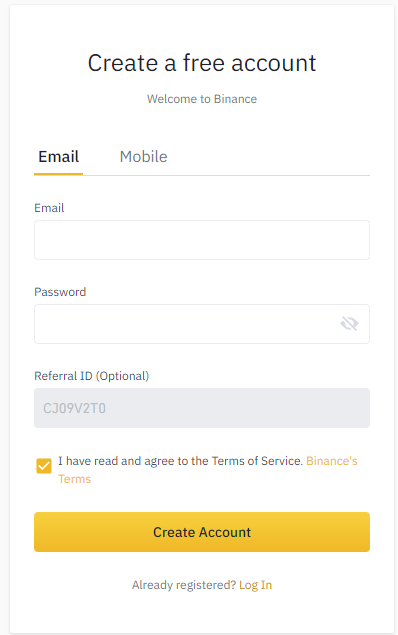
If you already have an account from the Binance exchange, then click the “Login” button in the upper right corner to log in directly (you can use the same account for both the Binance pool and the Binance Exchange).
If not, click the Create Account button in the upper right corner to complete the registration.
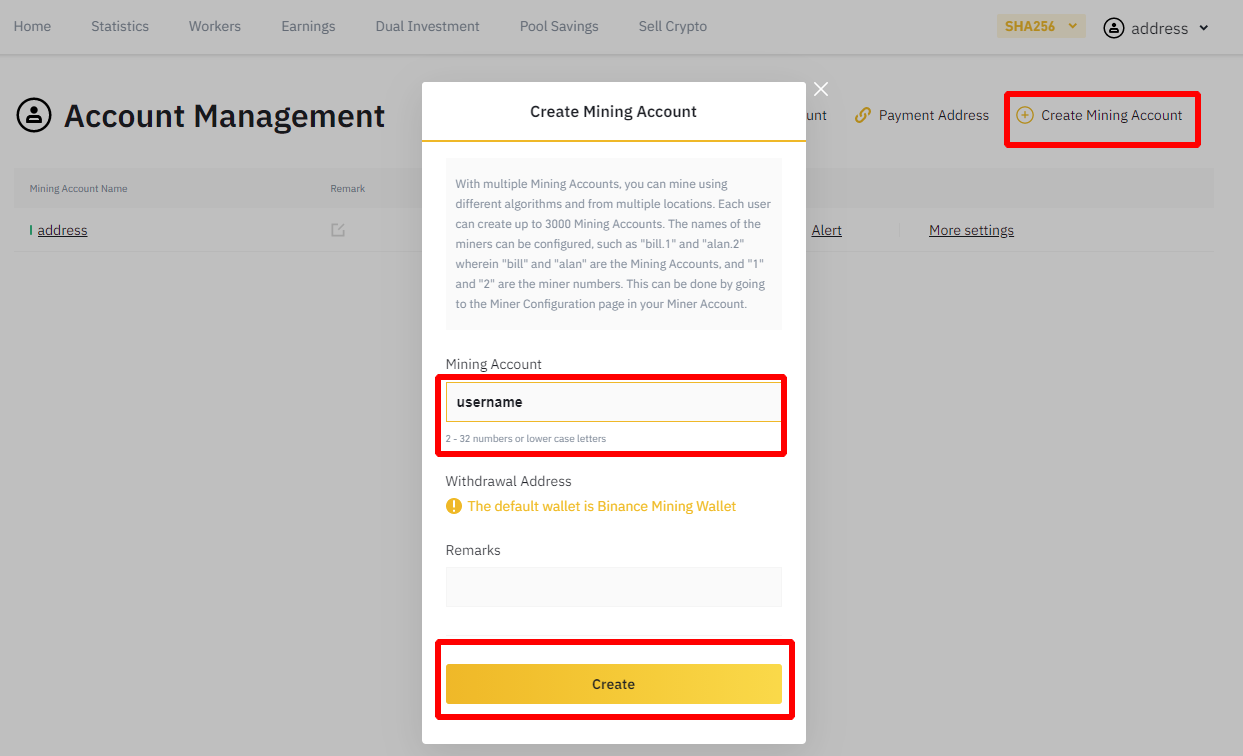
Step 3: Create a mining account. After logging in, click on “Manage Mining Account” to create a mining account.

This is where you will assign a username to the mining account. Enter the appropriate username for the miner to be used on this account.
3. How to get mining software
1) Mining software:
2) Operating system for mining:
Windows 10: Suitable for those who mine on a work computer. Also, this system is good because it is widely known and does not require complex configuration.
Hive OS: A mining platform that allows users to more efficiently and easily set up, mine and monitor processes on thousands of farms in one place. Everything you and your team need to keep your farm running at peak efficiency.
Minerstat: Professional remote crypto mining software stack with dedicated OS and mining apps for Windows and ASIC. Minerstat covers all important features such as built-in mining calculator, test, profit switch, diagnostics and dozens of other tools that make the mining manager’s job easier.
MinerOS: Linux-based miner management system that supports cloud package management for mining machines. The system ROM supports U disk and diskless installation and includes embedded original third-party software.
Easy Miner: Supports over 90 types of coins. Allows you to change the pool, coin and wallet for batch mining in one click; one-click batch update of the kernel, software and drivers; and one-click batch overclocking without relying on ShadowsocksR.
4. Set up mining software
1) Configure miners using Windows, HiveOs or Minerstat (NVIDIA and AMD cards):
If this is your first time using HiveOs, check out the Hive OS guide.
If this is your first time using Minerstat, check out “How to set up mining on Binance pool? ”.
Set up your account using ETH mining. To start using your miner, please log into your Binance Pool mining account to set Binance Pool as your default mining pool.
2) Setup Phoenix miner (NVIDIA and AMD cards):
After downloading the latest version of the mining software unzip it, find the start.bat or start.cmd file, right-click it and select “Edit”.
Replace the existing commands in the file with the commands from the table below that correspond to your chosen coin mining software. .
| Software | Commands |
| PhoenixMiner | PhoenixMiner.exe -pool ethash.poolbinance.com:8888 -wal username1 -worker worker_name -epsw x -asm 2 -dbg -1 -allpools 1 -mode 1 |
| Claymore Miner | EthDcrMiner64.exe -epool ethash.poolbinance.com:8888 -ewal username1 -worker worker_name -epsw x -asm 2 -dbg -1 -allpools 1 -mode 1 |
Replace the “ username1 ” with the name of your mining account. Finally, save the .bat file and exit. When you’re ready to start mining, double-click the .bat file.
Select “Extract to current folder” and locate the batch file “ start.bat ”.
You can also choose one of these alternative ETH mining pool addresses:
Monitoring miners and viewing income
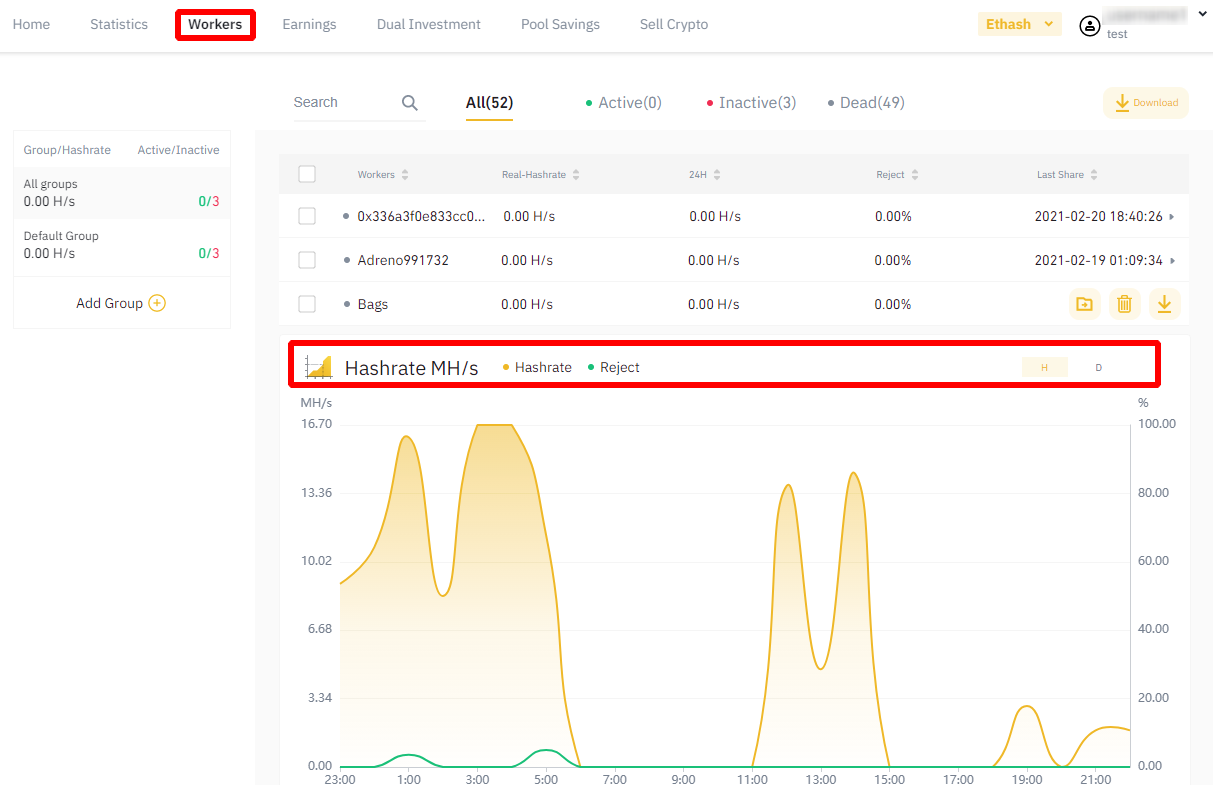
After the miner has worked a bit and sent the data to the mining pool (usually it takes 15-20 minutes of mining), you can view the miner’s working status and profitability.
To mine with the Binance Pool, you can log into the official Binance Pool website at pool.binance.com and navigate to ETH in the top right corner.
You can check your income and miner status in the “ Statistics ” panel and on the “ Workers ” page.
You can also use the Binance Pool app (click to download). You can view the related information after logging in.
If you have any questions about Ethereum mining or need help, please send an email to [email protected] for more advice
Ready example
PhoenixMiner.exe -pool ethash.poolbinance.com:8888 -wal username1 -worker worker_name -epsw x -asm 2 -dbg -1 -allpools 1 -mode 1 eth pause
Just change username1 to your account name.
You can download PhoenixMiner 5.6d from here:
Источник
Phoenix Miner 5.6d: Настройки для Binance, Скачать, Команды
3 мин на чтение
В этом руководстве вы узнаете, как настроить и использовать PhoenixMiner для майнинга Ethereum.
Скачать для Windows/Linux
Что такое PhoenixMiner
PhoenixMiner — это майнер для криптовалют алгоритма Dagger Hashimoto (Ethash). В первую очередь, это Ethereum, Ethereum Classic, Callisto и другие популярные монеты. Программа работает как с видеокартами AMD, так и с Nvidia. По словам разработчиков, это самый быстрый майнер Ethereum/Ethash с самой низкой комиссией.
Как настроить PhoenixMiner
Шаг 1 — Скачайте майнер
Скачайте программу PhoenixMiner, распакуйте ее в отдельную папку и найдите start.bat . 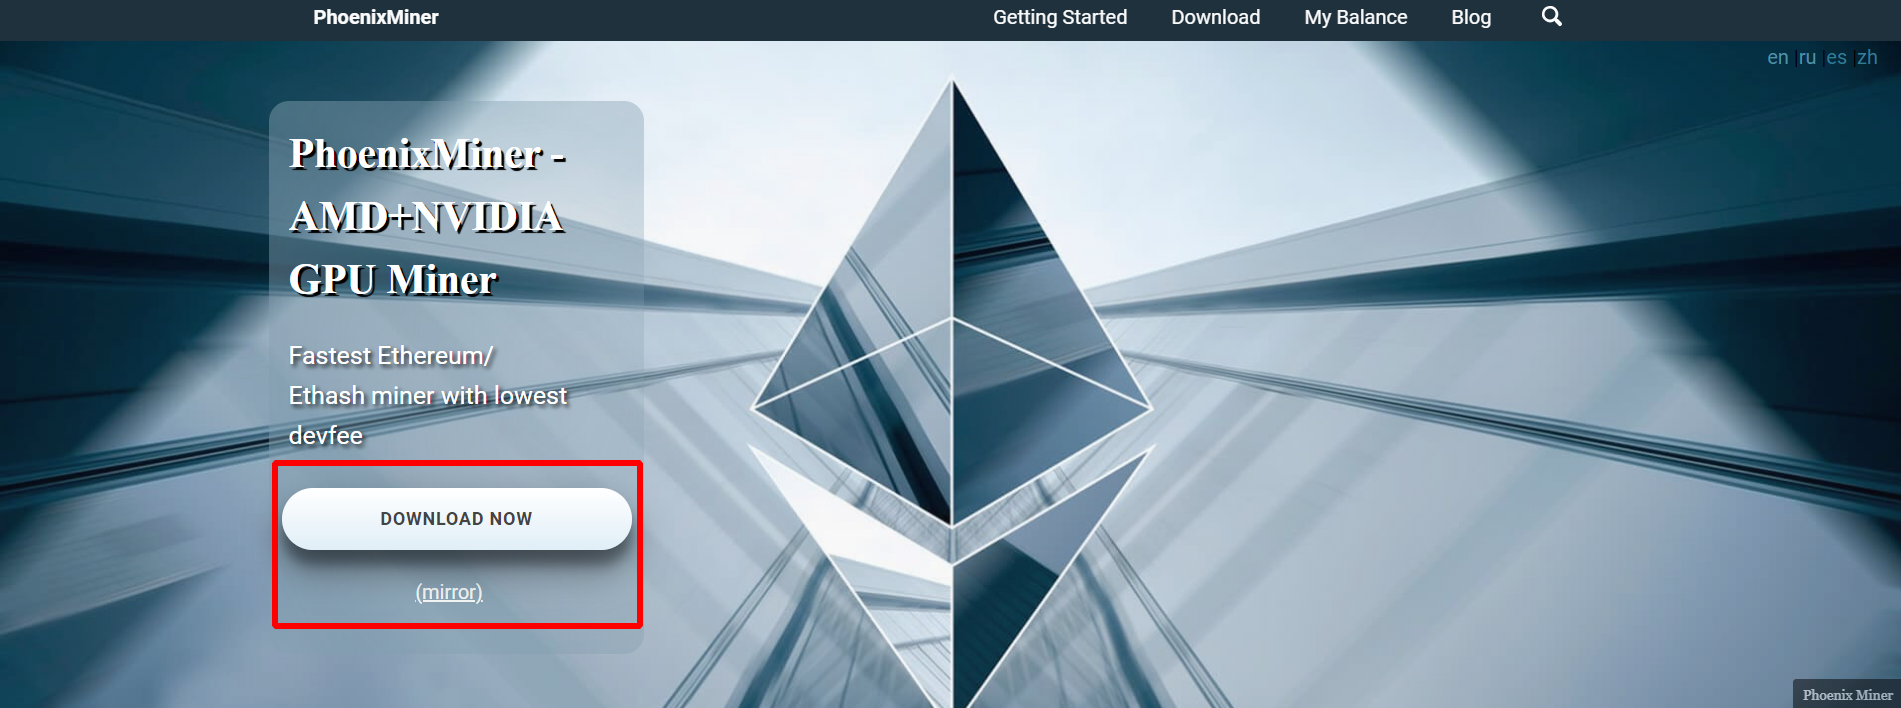
Шаг 2 — Настройте батник для Ethereum на Binance Pool
Откройте файл start.bat с помощью Notepad++ или любого подходящего текстового редактора и отредактируйте файл start.bat . Вы должны изменить логин пула (слово после -wal ). username1 замените на ваш логин пула, либо если на пуле нет регистрации, то вставьте после -wal адрес вашего кошелька.
Вот пример .bat-файла Феникс Майнера для пула Binance Pool:
Шаг 3 — Запустите PhoenixMiner
Сохраните этот файл и затем дважды щелкните start.bat , чтобы начать майнинг. Когда в окне CMD отображается слово «Accept» («Принято»), это означает, что вы успешно отправили свое решение в пул. Далее статистику майнинга можно смотреть на пуле. Она появится примерно через 15 минут после начала майнанга.
Видео Гид
Пример PhoenixMiner для Ethermine
| STRATUM (адрес пула): | eu1.ethermine.org |
| PORT: | 4444 |
| Username (-wal): | 0xBB942274AB3C8285400519e7F0c343Fca2394908 |
| Password: | default |
Так будет выглядеть батник PhoenixMiner для ETH на пуле Ethermine:

Чтобы настроить батник для ETH нам нужно поочередно ввести 5 команд в .bat файл:
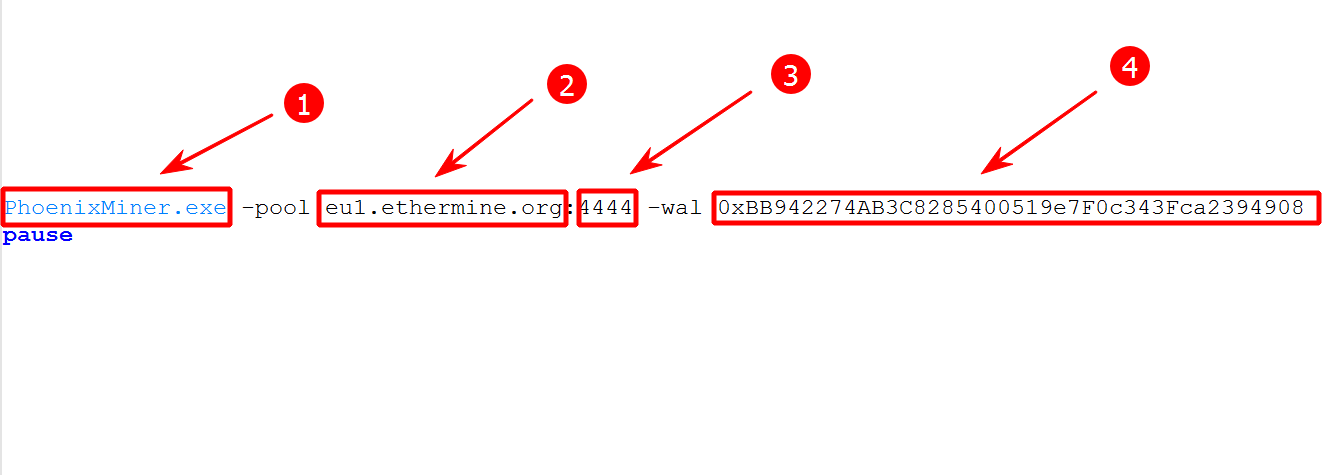
- PhoenixMiner — имя запускаемой нами программы.
- eu1.ethermine.org — адрес пула для майнинга.
- 4444 — порт пула.
- 0xBB942274AB3C8285400519e7F0c343Fca2394908 — адрес кошелька, на который идет добыча.
Так будет выглядеть готовый батник Phoenix Miner:
Обратите внимание на синтаксис. Ни в коем случае не допускаются лишние пробелы, символы, переносы строки. Если будут лишние символы, то Феникс Майнер не запустится.
PhoenixMiner настройка для NiceHash
Вот батник для НайсХеш:
В каждом примере в конце .bat файла есть слово pause . Это поможет держать окно CMD всегда открытым. Даже если вы допустили ошибку в синтаксисе. В этом случае консоль CMD отобразит надпись в чем ошибка.
Мониторинг и прибыль
После того, как майнер отправит несколько решений (примерно за 10-15 минут рабты), вы можете проверить статус работы и прибыль на странице «Доходы» в аккаунте на бирже или на том пуле, который вы выбрали.
Алгоритмы и хешрейт
| Алгоритм | Монета | P106-100 | P104-8G | 1070ti | 1080ti | 2080 | RX580, 2048sp |
|---|---|---|---|---|---|---|---|
| ethash | ETH | 25 MH/s | 37 MH/s | 32 MH/s | 46 MH/s | 43 MH/s | 30 MH/s |
| etchash | ETC | 25 MH/s | 37 MH/s | 32 MH/s | 46 MH/s | 43 MH/s | 30 MH/s |
| ProgPOW | BCI | 10 MH/s | 15 MH/s | 15 MH/s | 22 MH/s | 27 MH/s | 9.4 MH/s |
| Ubqhash | UBIG | 22.5 MH/s | 39 MH/s | 31.5 MH/s | 52.5 MH/s | 44.3 MH/s | 32.2 MH/s |
Сравнение PhoenixMiner vs TeamRedMiner
Команды
Если указаны <>, то вместо <> нужно подставить значение без символов <> .
-pool — Адрес пула (добавьте к имени хоста ssl:// для SSL соединения или http:// для соло-майнинга).
Пример:
PhoenixMiner.exe -pool ssl://eu1.ethermine.org:5555
-wal — Кошелек (некоторые пулы требуют добавления логина и / или воркера).
Пример с кошельком:
-wal 0xBB942274AB3C8285400519e7F0c343Fca2394908
Пример с логином:
-wal username1
— Пароль (для большинства пулов он не требуется, используйте x качестве пароля, если не уверены, что на пуле есть пароль).
-worker — Имя воркера (большинство пулов принимают его как название вашей фермы или кошелька, можно указать любое).
Если указано , то вместо нужно подставить число без символов <> .
-proto — Выбирает тип stratum протокола для пула ethash:
miner-proxy — спецификация stratum для майнинга в режиме прокси (например, для пула Coinotron)
eth-proxy — (например, для пулов ethermine, nanopool) — это значение по умолчанию, работает для большинства пулов.
qtminer (например, ethermine, ethpool)
EthereumStratum/1.0.0 (например для nicehash)
PhoenixMiner заблокирован хромом
Иногда PhoenixMiner блокируется хромом. Если вы обновили браузер Google Chrome до версии 91, вы могли заметить, что загрузка некоторых файлов в браузере больше не работает.
Но сначала вот краткое объяснение того, почему это происходит, если вы знаете, что файл, который вы пытаетесь загрузить, безопасен. Google Chrome и другие веб-браузеры будут пытаться идентифицировать потенциально вредоносные файлы. Одним из незначительных недостатков этой концепции является то, что большинство веб-браузеров часто помечают неизвестные файлы как вредоносные. Это широко известно как эвристика, что является причудливым словом для предположения.
Но возникает проблема: файлы, которые Chrome считает небезопасными, могут быть «чистыми». Это может расстраивать, когда Chrome продолжает блокировать загрузку из надежного источника.
Источник