- Get started on binance
- Binance Beginner’s Guide
- Introduction
- How to create a Binance account
- How to buy crypto on Binance
- Purchasing crypto with a credit/debit card
- How to trade crypto on Binance
- How to secure your Binance account
- Use a strong password and change it regularly
- Enable Two-Factor Authentication (2FA)
- Enable the Binance Anti-Phishing Code
- An Introduction to Binance Bridge
- Introduction
- What is the Binance Bridge Project?
- How does the Binance Bridge Project work?
- What is “Peg-in” and “Peg-out”?
- Closing thoughts
- Get started on binance
- The Ultimate Guide to Trading on Binance Futures
- How to open a Binance Futures account
- How to fund your Binance Futures account
- Binance Futures interface guide
- How to adjust your leverage
- What is the difference between Mark Price and Last Price?
- What order types are available and when to use them?
- Limit Order
- Market Order
- Stop Limit Order
- Stop Market Order
- Take Profit Limit Order
- Take Profit Market Order
- Trailing Stop Order
- How to use the Binance Futures calculator
- How to use Hedge Mode
- What is the Funding Rate and how to check it?
- What is Post-Only, Time in Force, and Reduce-Only?
- When are your positions at risk of getting liquidated?
- What is auto-deleveraging and how can it affect you?
Get started on binance
Here’s a quick guide on how you can create your own Binance Smart Chain Wallet.
1. Download MetaMask here .
2. Complete basic setup. (Remember to save your backup phrases)
3. Click “Main Ethereum Network” at the top.
4. Click “Custom RPC”
5. Copy and paste each line into each box as below.
It should look like this:
Copy and paste the text from the box below:
Binance Smart Chain
Copy and paste the text from the box below:
Copy and paste the text from the box below:
Copy and paste the text from the box below:
Block Explorer URL
Copy and paste the text from the box below:
7. Congrats! You now have a Binance Smart Chain Wallet!
Read more on Binance Academy about connecting MetaMask to Binance Smart Chain, or learn about MetaMask on Decrypt.
Источник
Binance Beginner’s Guide
Introduction
How to create a Binance account
2. Input your email address and choose a secure password. If you’ve been given a referral code from a friend, now is also the time to enter it.
3. Follow the instructions for verifying your account by inputting the code sent to your email address or mobile number.
Once you’re verified, you should now be set up with your Binance account. You’re one step closer to buying cryptocurrency, so let’s dive into making your first crypto purchase.
How to buy crypto on Binance
You’ve got a few options to choose from when purchasing crypto:
Purchasing crypto with a credit/debit card
If you are still on the Binance welcome screen, select [Buy crypto with your credit card]. Otherwise, hover over [Buy Crypto] and select [Credit/Debit Card] from the Binance homepage.
Select the currency you will be paying with and the coin you wish to purchase. In our example, we’ve gone for £100 of bitcoin (BTC). Press the [Buy] button to proceed with inputting your card details.
Once the process is complete, your purchased crypto will be credited to your [Fiat and Spot] wallet. Usually, opening an account and getting to this stage can be done within 10 minutes.
How to trade crypto on Binance
At some point, you will likely want to start trading cryptocurrencies. If you’re not used to a traditional trading interface, we recommend using the Convert feature. You can access this by hovering over [Trade] and selecting [Convert] from the Binance homepage.
With the Convert tool, you can pick the cryptocurrency pair you wish to trade using a simple interface. Fiat currencies are also available if you want to cash out or buy crypto with fiat.
Select the coin you are exchanging in the top field and input the amount. Use the bottom field to select your desired cryptocurrency or fiat currency. In our example, we will trade BNB for BTC. After confirming your selection, the trade will take place at the market price. Trading fees are also applicable and taken automatically.
Next on the list for any Binance beginner is to think about improving the security of their account. After going through the effort of trading some crypto, it should be your top priority to make sure it’s safe.
How to secure your Binance account
Improving the security of your account is vital in the crypto world. Using a strong password and our in-built security features will help keep your funds safe. Make sure to start with the following security steps.
Use a strong password and change it regularly
This one is self-explanatory, but you would be choked with the number of people that still use passwords that are simple and easy to remember. Your password should always contain uppercase and lowercase characters mixed with symbols and letters. And of course, make sure you keep it safe and do not share it with anyone.
Enable Two-Factor Authentication (2FA)
We strongly recommend you set your account up with Two-factor Authentication (2FA). This creates an extra layer of security, meaning that even if hackers compromise your password, they would need access to your physical 2FA device to log in.
Enable the Binance Anti-Phishing Code
When you add an anti-phishing code to your Binance account, every email you get from Binance will have this code displayed at the top. This way, you can be sure that the message you are receiving is actually from Binance and not from a fake email address. In other words, it helps you prevent phishing attacks.
Источник
An Introduction to Binance Bridge
TL;DR:
The Binance Bridge Project aims to increase interoperability between different blockchains. It lets anyone convert their crypto assets into (and back from) Binance Chain and Binance Smart Chain wrapped tokens.
Why can this be useful? Well, this way, you can use your BTC, ETH, USDT, or other assets in Binance Smart Chain (BSC) DApps. Do you HODL BTC but want to harvest the latest yield farming opportunity on BSC? No worries, you can maintain exposure to your Bitcoin while still participating in DeFi on Binance Smart Chain.
Introduction
Currently, there is a bit of an issue in the crypto space. Different blockchains can’t really talk to each other. If you make a Bitcoin transaction, the Ethereum blockchain won’t be able to know that it happened. If we zoom out a little bit and look into the future, this problem will likely be solved somehow with new technology. However, a much faster solution that is already available now is wrapped coins and tokens.
What is the Binance Bridge Project?
How does the Binance Bridge Project work?
Wrapping a coin or token into a Binance Chain version is actually quite straightforward. Using the Binance Bridge service, you can convert cryptoassets between the native blockchain and Binance Chain/Binance Smart Chain. For example, if you transfer USDT from Ethereum to Binance Smart Chain, Binance Bridge will support the cross-chain conversion of Ethereum ERC-20 to Binance BEP-2 or BEP-20. It’s worth noting that these wrapped coins are backed by real coins and tokens on public addresses.
Once you’ve set the parameters, the conversion time is quite short, and it should take around a few minutes to execute a cross-chain conversion. This, of course, depends on blockchain network confirmation times. What does this mean exactly? Well, depending on the blockchain you’re trying to convert from, the process may take more during times of congestion and high activity.
As far as fees are concerned, Binance Bridge charges zero conversion fees. You’ll only need to pay network transaction fees on the blockchains that you are converting between.
Do you need a Binance account to use the Binance Bridge? No. The Binance Bridge interface is open to any address without the need to register a Binance account.
On the other hand, if you do have a Binance account, deposits and withdrawals are open for a number of BEP-2 and BEP-20 assets. This way, you don’t have to worry about wrapping the assets yourself, and you can store, trade, and transfer them like any other token.
What is “Peg-in” and “Peg-out”?
The “Peg-in” feature allows you to convert from native blockchains to Binance Chain/Binance Smart Chain tokens. Conversely, “Peg-out” means converting from Binance Chain/Binance Smart Chain tokens to native blockchain tokens.
Once a transaction is complete, Binance Bridge will lock the tokens, and the peg to Binance Smart Chain is complete. This is when you can start using your pegged tokens.
Closing thoughts
The Binance Bridge Project is an important tool for increasing cross-compatibility in the blockchain space. Anyone can peg coins and tokens to be used on Binance Chain/Binance Smart Chain. The number of tokens to be supported will increase over time, leading to better access to liquidity on Binance Smart Chain.
The Binance Bridge is just one piece of a bigger project. Binance aims to increase even more the cross-chain liquidity between different blockchains. Stay tuned for more!
Источник
Get started on binance
Here’s how you can get set up on Trust Wallet and start using Binance Smart Chain in just a couple of minutes.
Setting up your wallet for Binance Smart Chain
1) Download Trust Wallet here . If you already have Trust Wallet, make sure your app is up to date.
2) Complete basic setup of a multi-coin wallet . Remember to save your backup phrases.
3) Go to your Smart Chain wallet and press receive to find your address.

4) Deposit BEP20 assets to your wallet. The easiest way to do this is with Binance. Choose an asset on Binance that supports BEP20 withdrawals and withdraw to your Trust Wallet Binance Smart Chain address. Keep in mind that BNB is required to make any transactions on Binance Smart Chain.

5) That’s it! You’re ready to start using Binance Smart Chain.
6) Once you’ve received a BEP20 token, to view your transaction ID you can click on the transaction, press the share button in the top right and then copy the transaction ID.

Using Binance Smart Chain Dapps
7) For this part, iOS users will need the Dapp browser, which you can get by following this guide . Android users have the Dapp browser by default.
8) Once you’ve topped up your wallet, open the Dapp browser by pressing on the four squares at the bottom of the app.
9) Navigate to a Binance Smart Chain Dapp like PancakeSwap or BurgerSwap.
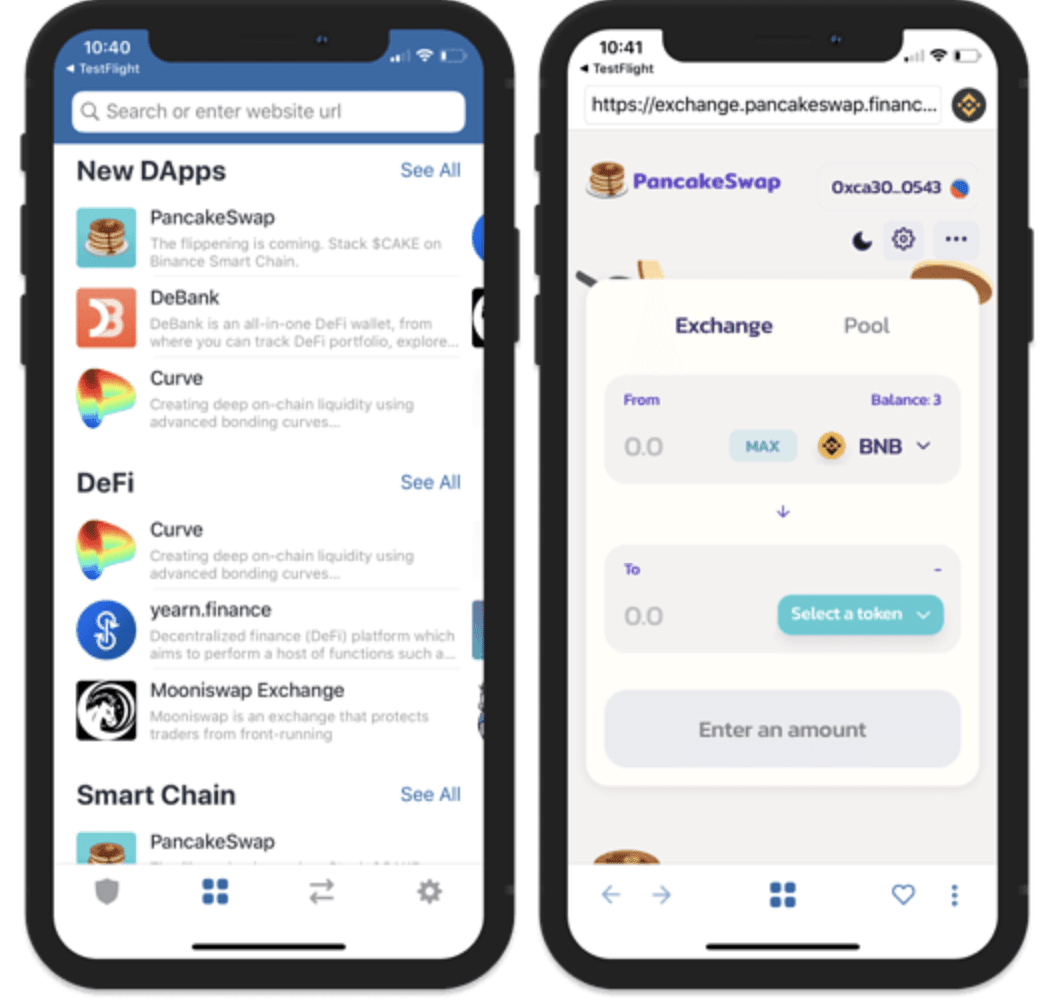
10) Use the Dapp and have fun!
Here are some more detailed guides on how to interact with Binance Smart Chain Dapps with Trust Wallet:
Источник
The Ultimate Guide to Trading on Binance Futures
How to open a Binance Futures account
Click on the Open now button to activate your Binance Futures account. And that’s it. You’re ready to trade!
How to fund your Binance Futures account
To transfer funds to your Futures Wallet, click on Transfer on the right side of the Binance Futures page.
Set the amount that you’d like to transfer and click on Confirm transfer. You should be able to see the balance added to your Futures Wallet shortly. You can change the direction of the transfer using the double-arrow icon as seen below.
Binance Futures interface guide
On the right side of the top bar is where you can access your Binance account, including your Dashboard. You can easily check your wallet balances and orders across the entire Binance ecosystem.
- Choose the contract by hovering over the current contract’s name (BTCUSDT by default).
- Check the Mark Price (important to keep an eye on, as liquidations happen based on the Mark Price).
- Check the expected Funding Rate and a countdown until the next funding round.
- See your current chart. You can switch between the Original or the integrated TradingView chart. You’ll get a real-time display of the current order book depth by clicking on [Depth].
- See live order book data. You can adjust the accuracy of the order book in the dropdown menu on the top right corner of this area (0.01 by default).
- See a live feed of previously executed trades on the platform.
Whenever you see an arrow on the bottom right corner of a module, that means you can move and resize that element. This way, you can easily create your own custom interface layout!
By clicking on Transfer, you can transfer funds between your Futures Wallet and the rest of the Binance ecosystem.
How to adjust your leverage
Binance Futures allows you to manually adjust the leverage for each contract. To choose the contract, go to the top left of the page and hover over the current contract (BTCUSDT by default).
To adjust the leverage, go to the order entry field and click on your current leverage amount (20x by default). Specify the amount of leverage by adjusting the slider, or by typing it in, and click on [Confirm].
It’s worth noting that the larger the position size is, the smaller the amount of leverage is that you can use. Similarly, the smaller the position size, the larger the leverage you can use.
Please note that using higher leverage carries a higher risk of liquidation. Novice traders should carefully consider the amount of leverage that they use.
What is the difference between Mark Price and Last Price?
To avoid spikes and unnecessary liquidations during periods of high volatility, Binance Futures uses Last Price and Mark Price.
The Last Price is easy to understand. It means the Last Price that the contract was traded at. In other words, the last trade in the trading history defines the Last Price. It’s used for calculating your realized PnL (Profit and Loss).
The Mark Price is designed to prevent price manipulation. It’s calculated using a combination of funding data and a basket of price data from multiple spot exchanges. Your liquidation prices and unrealized PnL are calculated based on the Mark Price.
Please note that the Mark Price and the Last Price may differ.
When you set an order type that uses a stop price as a trigger, you can select which price you would like to use as the trigger — the Last Price or the Mark Price. To do this, select the price you wish to use in the Trigger dropdown menu at the bottom of the order entry field.
What order types are available and when to use them?
There are many order types that you can use on Binance Futures:
Limit Order
Market Order
Stop Limit Order
Although the stop and limit prices can be the same, this is not a requirement. In fact, it would be safer for you to set the stop price (trigger price) a bit higher than the limit price for sell orders, or a bit lower than the limit price for buy orders. This increases the chances of your limit order getting filled after the stop price is reached.
Stop Market Order
Similar to a stop-limit order, a stop market order uses a stop price as a trigger. However, when the stop price is reached, it triggers a market order instead.
Take Profit Limit Order
If you understand what a stop-limit order is, you will easily understand what a take-profit limit order is. Similar to a stop-limit order, it involves a trigger price, the price that triggers the order, and a limit price, the price of the limit order that is then added to the order book. The key difference between a stop-limit order and a take profit limit order is that a take profit limit order can only be used to reduce open positions.
A take profit limit order can be a useful tool to manage risk and lock in profit at specified price levels. It can also be used in conjunction with other order types, such as stop-limit orders, allowing you to have more control over your positions.
Take Profit Market Order
Trailing Stop Order
A trailing stop order helps you lock in profits while limiting the potential losses on your open positions. For a long position, this means that the trailing stop will move up with the price if the price goes up. However, if the price moves down, the trailing stop stops moving. If the price moves a specific percentage (called the Callback Rate) in the other direction, a sell order is issued. The same is true for a short position, but the other way round. The trailing stop moves down with the market but stops moving if the market starts going up. If the price moves a specific percentage in the other direction, a buy order is issued.
The Activation Price is the price that triggers the trailing stop order. If you don’t specify the Activation Price, this will default to the current Last Price or Mark Price. You can set which price it should use as a trigger at the bottom of the order entry field.
The Callback Rate is what determines the percentage amount the trailing stop will “trail” the price. So, if you set the Callback Rate to 1%, the trailing stop will keep following the price from a 1% distance if the trade is going in your direction. If the price moves more than 1% in the opposite direction of your trade, a buy or sell order is issued (depending on the direction of your trade).
How to use the Binance Futures calculator
You can find the calculator at the top of the order entry field. It allows you to calculate values before entering either a long or a short position. You can adjust the leverage slider in each tab to use it as a basis for your calculations.
The calculator has three tabs:
How to use Hedge Mode
In Hedge Mode, you can hold both long and short positions at the same time for a single contract. Why would you want to do that? Well, let’s say you’re bullish on the price of Bitcoin in the longer term, so you have a long position open. At the same time, you may want to take quick short positions on lower time frames. Hedge Mode allows you to do just that – in this case, your quick short positions won’t affect your long position.
The default position mode is One-Way Mode. This means that you can’t open both long and short positions at the same time for a single contract. If you tried to do it, the positions would cancel each other out. So, if you want to use Hedge Mode, you’ll need to enable it manually. Here’s how you do that.
1. Go to the top right of your screen and select [Preference].
Please note that if you have open orders or positions, you won’t be able to adjust your position mode.
What is the Funding Rate and how to check it?
The Funding Rate makes sure that the price of a perpetual futures contract stays as close to the underlying asset’s (spot) price as possible. Essentially, traders are paying each other depending on their open positions. What dictates which side gets paid is determined by the difference between the perpetual futures price and the spot price.
When the Funding Rate is positive, longs pay shorts. When the Funding Rate is negative, shorts pay longs.
So what does this mean for you? Well, depending on your open positions and the Funding Rates, you’ll either pay or receive funding payments. On Binance Futures, these funding payments are paid every 8 hours. You can check the time and the estimated Funding Rate of the next funding period on the top of the page, next to Mark Price.
If you’d like to check the previous Funding Rates for each contract, hover over [Information] and select [Funding Rate History].
What is Post-Only, Time in Force, and Reduce-Only?
When you use limit orders, you can set additional instructions along with your orders. On Binance Futures, these can either be Post-Only or Time in Force (TIF) instructions, and they determine additional characteristics of your limit orders. You can access them at the bottom of the order entry field.
Post-Only means that your order will always be added to the order book first and will never execute against an existing order in the order book. This is useful if you would only like to pay maker fees.
TIF instructions allow you to specify the amount of time that your orders will remain active before they are executed or expired. You can select one of these options for TIF instructions:
When you’re in One-Way Mode, ticking Reduce-Only will ensure that new orders you set will only decrease, and never increase your currently open positions.
When are your positions at risk of getting liquidated?
The Maintenance Margin is the minimum value you need to keep your positions open. It varies according to the size of your positions. Larger positions require a higher Maintenance Margin.
You can check your current Margin Ratio in the bottom right corner. If your Margin Ratio reaches 100%, your positions will be liquidated.
When liquidation happens, all of your open orders are canceled. Ideally, you should keep track of your positions to avoid auto-liquidation, which comes with an additional fee. If your position is close to being liquidated, it may be beneficial to consider manually closing the position instead of waiting for the auto-liquidation.
What is auto-deleveraging and how can it affect you?
The order of these position reductions is determined by a queue, where the most profitable and the highest leveraged traders are at the front of the queue. You can check your current position in the queue by hovering over [ADL] in the [Positions tab].
Источник